Tuesday, October 18, 2011

iPad converter Suite – Powerful iPad software for you to enjoy

iPad becomes a hot topic nowadays and almost everyone wants to own one for it is great and exciting to watch movies or read books on iPad no matter where you go. However, it is known to all that the video and audio formats with which iPad is compatible are limited. Therefore, to view DVD or videos like AVI, FLV, TS, RM, RMVB, WMV, ASF, MKV, 3FTS, RM, RMVB, WMV, ASF, MKV, 3GP etc. on iPad, you have to convert them to iPad supporting format with a iPad converter; to keep your iPad files from losing or being damaged, you have to backup or copy them to computer. There is a shortcut for you: iPad Converter Suite is absolutely your best assistant to help you manage your iPad or iPad 2.

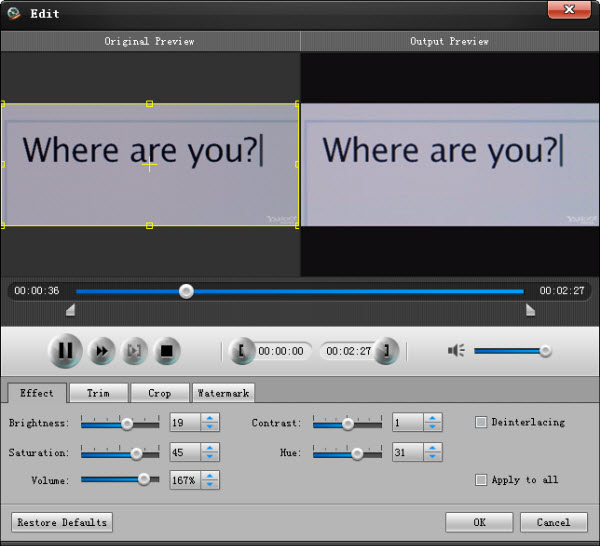
iPad Converter Suite composed of DVD to iPad Converter, iPad Video Converter and iPad Transfer provides users with powerful editing functions so that they can customize the output files according to their preference. Both of the DVD to iPad Converter and iPad Video Converter enable users to get the most ideal and best effects by trimming and cropping videos, merging several videos or clips to a whole single one, adjusting visual effect through resetting video brightness, contrast and saturation, and adding watermark to the output videos and so forth. In addition, you will be amazed attracted by the iPad Transfer which can search and automatically detect all the files and information quickly and directly when operating the transferring music/video/image between iPad and computer.

And next I will show you how to convert your DVD to iPad with iPad Converter Suite.

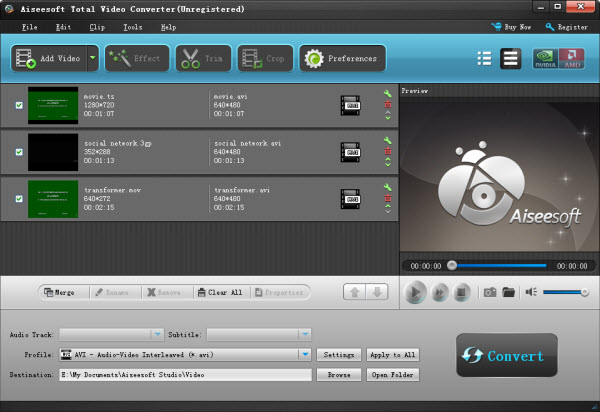
You need download this iPad Converter Suite, install and run it on your PC, and then you can see the friendly interface below:


And then click “DVD to iPad Converter”, so you will enter the DVD to iPad Converter functions.


Step 1: Add File - Click to browse the computer to find your wanted files to the file list.

Step 2: Set output format - Choose the iPad as your device and the next drop-down list will appear the output formats which iPad supports.


Step 3: Select output folder – Click “Browse” to find the familiar place to you to put output file.

Step 4: Convert video – Click “Convert” to start converting DVD to iPad.
DVD to iPad Converter can finish the converting DVD to iPad automatically after setting all, so you can save the time to do the important things.

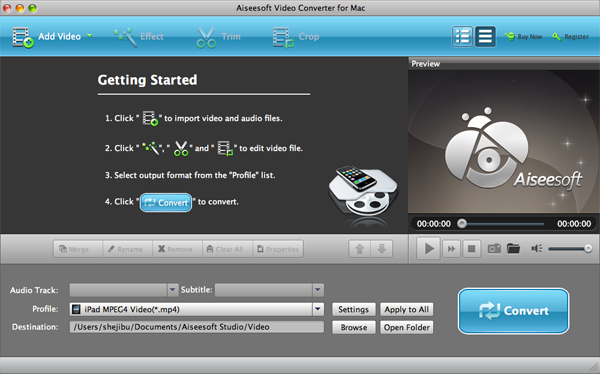
Seeing, so you can also using this iPad Converter Suite to convert your video files to iPad and iPad 2, then using this software to transfer it to your iPad.

How to convert and edit video among popular video formats on Mac and Windows

For Windows and Mac users:
Here I want to introduce two powerful video converters, and at the same time they are also excellent video editors, which are Aiseeesoft Total Video Converter and Aiseesoft Video Converter for Mac.

And now the following content will show how to use them.
Part 1: how to convert and edit video on Windows
Preparation: Download Aiseesoft Total Video Converter, install and run it.
Step 1: Click "Add File" to import your video or audio files


Step 2: Select output format.
After you select the files you want to convert, you can select the output format from "Profile" drop-down list.
You can also click "setteing" button to adjust the settings of your output video, such as "video/audio encoder", "Video/audio Bitrate", "Channels", "Resolution" and so on.

Step 3: Video Editing
Effect
Click the "Effect" button and a dialog pops up, you can set your video effect here.
You can set the Brightness, Contrast and Saturation by dragging the adjustment bar.


Trim
If you just want to convert a clip of your video, then you can click the "Trim" button and a dialog pops up, you can set the Start time and End time.

Crop
Click "Crop" button, then you can crop your video by setting crop values.

Add Watermark
Click "Watermark" button to add txt/picture watermark to your video, and adjust the watermark by setting the horizontal, vertical and Transparent parameters.

Step 4: Click "Convert" button to start your conversion
Just wait a moment, then the conversion will be finished.

Part 2: how to convert and edit video on Mac
Preparation: Download Aiseesoft Video Converter for Mac, install and run it.
Step 1: Click "Add File" to import your video or audio files


Step 2: Select output format video format you want from the "Profile" drop-down list.
Step 3: Click "Start" button to start your conversion
Just wait a moment, then the conversion will be finished.

Video Editing functions
1. Effect
Click "Effect" button you can do these actions: adjusting brightness, contrast and saturation of the video. You can easily adjust the video through two windows in the same interface.


2. Trim
If you just want convert a clip of your video, then you can use the "Trim" icon to set the Start time and End time of the clip or you can directly drag the slide bar to the accurate position.

3. Crop
By using the "Crop" function you can crop the black edge of your video and you can also drag the line around the video image to adjust your video.

Just have a try now! And if you are interested in other video converter, you can get more information from this Video Converter Reviews.

Monday, October 17, 2011

How to transfer files between iPad and PC

Transferring your iPad photos to your PC as backup or transferring them from PC to iPad for appreciation? When these ideas come to your mind, what will you do? Will you still use iTunes? No, if so, you are out. To back up your photos to PC and to copy your photos to iPad, iPad Transfer, is the best choice without denying.

Apart from transferring photos between iPad and PC, you can replant audios and videos. Besides, this kind of transfer removes iTunes, which can save much time of iPad users. Even if your favorite is iTunes backup, iPad Transfer offers iPad to iTunes transfer. In a word, with Tipard iPad Transfer your transfer, esp. transferring photos, among iPad, PC and iTunes will become very easy.

Part One: How to Transfer Music from PC to iPad?
Step I: Download and Connect.
Download the software — iPad Transfer, install and run it, and connect your iPad to PC. You will see the following interface.

Step II: Choose and Import.
Click "File" or the button
To choose the music files from computer. Then there will pop up a "Task Process" window automatically.


After transferring, just click "OK".

Part Two: How to transfer music from iPad to PC?

Step 1: Download and Connect.
Download the software—Tipard iPad Transfer, install and run it, and connect your iPad to PC. You will see the same interface as Part one.

Step 2: Choose and Export.
Click "Actions" or
To select the destination of the exporting music files and start exporting files. A "Task Process" window also pops up and you just need to click "OK", when transferring finish.
Also, if you want to transfer iPad files to PC, you can use professional iPad to PC Transfer.